Pages

Showing posts with label New. Show all posts

Sunday, April 23, 2017

Ginisang Sardinas with Ampalaya (Sautéed Sardines with Bitter Melon)

Ginisang Sardinas with Ampalaya or Sautéed Sardines with Bitter Melon is a simple Filipino dish that consist of canned sardines in tomato sauce and sliced bitter melon. These are sauted with garlic and onion. I topped the dish with chopped scallions and toasted garlic to make it look and taste better. It is best eaten with rice and can be consumed either for breakfast, lunch, or dinner.

How to Cook Ginisang Sardinas with Ampalaya Recipe Panlasang Pinoy

I cook this regularly when I was still in the Philippines because convenient in many ways. Timewise, it takes me a very short amount of time to prepare the dish. It is ideal if I am busy or in a hurry to complete something or go somewhere but needed a quick meal. It is also favorable financially because it does not cost much. It is budget friendly.

Although it is easy and simple, I am picky when it comes to the brand of sardines that I use. I almost tried all the local sardines brands in the Philippines and I developed a liking on a particular brand because of its quality. I am happy to know that my brand of sardines is available here in the US. This was the reason why I was able to make this dish. Do not let my brand preference get on your way, use any brand of sardines that you prefer.

Ginisang Sardinas with Ampalaya Recipe

I remember having this dish as a kid. Me and my friends would cut a fresh banana leaf from the nearby vacant lot inside the subdivision that we live in Las Pinas. It was a very happy place. In fact, the subdivision is called Happyville. Back then, I haven’t heard of the term “boodle fight” yet, but we were doing it apparently when we scatter a pot of newly cooked rice over the banana leaf and pour all the sauteed sardines over the rice. We ate with our hands, of course. I’m sure that you can imagine how our hands smelled like afterwards. The meal was special though even if it was simple because it was shared equally by everyone.

Ginisang Sardinas with Ampalaya

Try this Ginisang Sardinas with Ampalaya (Sautéed Sardines with Bitter Melon) Recipe. Let me know what you think.

Ginisang Sardinas with Ampalaya
 
Prep time
Cook time
Total time
 
This is a recipe for Sauteed Sardines with bittermelon. It is translated as Ginisang Sardinas with Ampalaya in Filipino.
Author:
Recipe type: Fish
Cuisine: Filipino
Serves: 3
Ingredients
  • 1 large can sardines in tomato sauce
  • 1 medium bitter melon (ampalaya), cored and sliced into thin pieces
  • 1 medium red onion
  • 5 cloves garlic, crushed
  • 2 tablespoons toasted garlic (optional)
  • 2 tablespoons chopped scallions (optional)
  • ⅛ teaspoon ground black pepper
  • 2 teaspoons fish sauce (patis)
  • 3 tablespoons cooking oil
Instructions
  1. Heat oil in a cooking pot
  2. Sauté garlic and onion until the garlic starts to turn light brown.
  3. Add the sliced bitter melon. Continue to sauté for 2 minutes.
  4. Pour the contents of the large can of sardines. Gently stir.
  5. Add ground black pepper and fish sauce. Cover and continue to cook in medium heat for 2 to 3 minutes.
  6. Transfer to a serving plate. Top with chopped scallions and toasted garlic.
  7. Serve. Share and enjoy!
Nutrition Information
Serving size:  3
3.5.3226

Ginisang Sardinas with Ampalaya Recipe Panlasang Pinoy
Read more ...

Tuesday, March 14, 2017

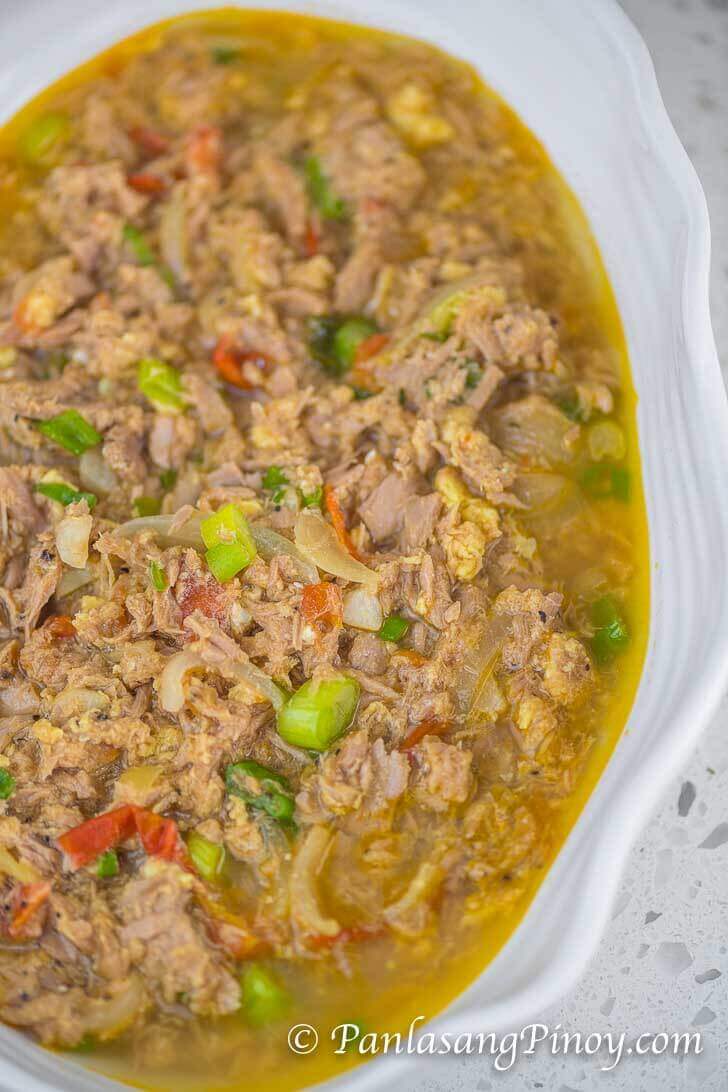
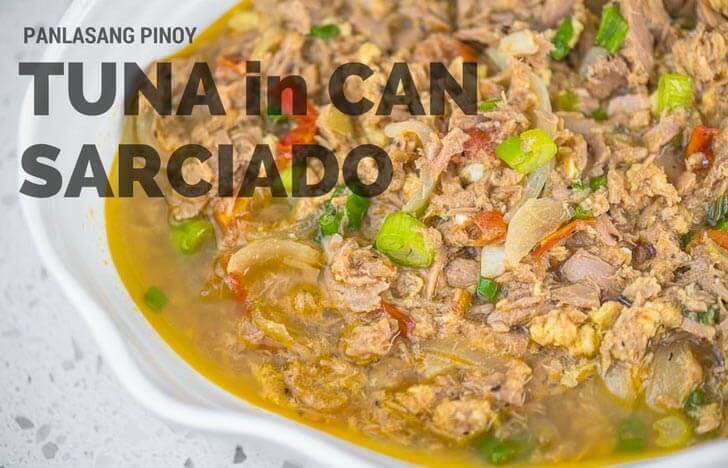
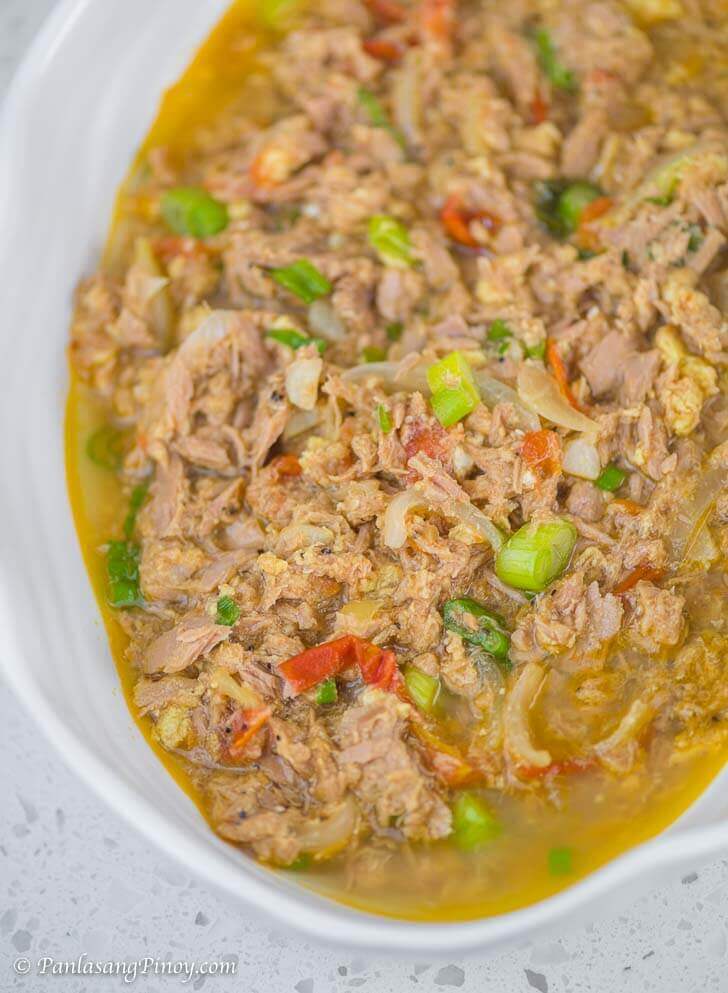
Tuna in Can Sarciado

Tuna in can Sarciado was my go to dish when I was still in the Philippines. Actually I had two go to dishes: this one and ginisang sardinas. I was always on the go and did not have the time to prepare my meals. In addition, I also had to manage my budget. It worked well for me– it even taught me a valuable lesson to appreciate the simple things in life.

Tuna in Can Sarciado Recipe Panlasang Pinoy

This was a dish that I usually make for breakfast. It was really good especially if I add lots of tomatoes in it. The recipe below calls for a piece of tomato, but feel free to use more. I think that this was way better compared to eating just regular tuna in can along with fried egg for breakfast when you are having it with rice. Why? Because aside from being colorful and appealing, this dish has a tasty sauce that you can pour over rice. It can increase your appetite and make you enjoy your meal even better.

Tuna in Can Sarciado

I used a bigger can of tuna for this recipe. It is equivalent to two cans of regular tuna in can in the Philippines. There are two types of regular canned tuna as far as I can remember: the one in oil and the other is in water – use the canned tuna in water. There are many different varieties of canned tuna, and some are even prepared to resemble common Filipino dishes such as adobo and Afritada. We do not need these; I am only talking about using plain tuna in water here, just for clarity.

Have you tried making this dish before? Let me know how you liked it. If you have tips and suggestions to share, please send me a comment. Thanks in advance.

Tuna in Can Sarciado Recipe

Try this Tuna in can Sarciado. Let me know what you think.

Tuna in Can Sarciado
 
Prep time
Cook time
Total time
 
This is a recipe for Tuna in Can Sarciado.
Author:
Recipe type: Fish
Cuisine: Filipino
Serves: 4
Ingredients
  • 1 (12oz. can) chunk light tuna in water
  • 1 egg
  • ½ cup chopped scallions
  • 1 medium yellow onion, sliced
  • 1 medium tomato, cubed
  • 3 cloves garlic, chopped
  • ¼ teaspoon ground black pepper
  • 2 tablespoons fish sauce (patis)
  • 1¼ cups water
  • 2 tablespoons cooking oil
Instructions
  1. Heat oil in a pan.
  2. Saute garlic, onion, and tomato until soft.
  3. Add the canned tuna (including the water from the can). Stir. Cook for 3 minutes.
  4. Pour the water into the pan. Let boil.
  5. Beat the egg and then pour into the pan. Let it cook for a few minutes until it starts to form. Stir.
  6. Add ground black pepper and scallions. Cook for 2 minutes.
  7. Pour the fish sauce into the pan. Add more water if preferred.
  8. Transfer to a serving plate. Serve.
  9. Share and enjoy!
Nutrition Information
Serving size:  4
3.5.3226

Watch the Video on How to Coook Tuna in Can Sarciado

Read more ...

Friday, June 19, 2015

Grilled Stuffed Tilapia Recipe

Grilled Stuffed Tilapia is like your typical grilled whole fish except that it is stuffed with delicious veggies inside. It is simple, easy-to-cook, delicious, and totally Filipino. I enjoyed having it with a dip of spicy toyomansi (ponzu).

Grilled Tilapia with Stuffing

So, how easy is it to make your own grilled stuffed tilapia? Let me tell you. I started out by buying the freshest tilapia from the Asian store. It is better if you can have them clean-up the fish by removing the scales, gills, and guts. Make sure to wash the fish using running water to make sure that it is clean and that the scales and other innards are completely removed. I then rub coarse salt all over the fish including the cavity. This gives the fish flavor and it can also make it last a bit longer, if you plan to cook it at a later time (you have to put it in a fridge or freeze it though if you plan to cook it after several hours).

The stuffing is simply a mixture of chopped tomato, onion, scallion, and ginger. I added lemon juice to make it fresh tasting along with salt and pepper for extra flavor. Simply scoop the mixture into the cavity of the fish then you are ready to grill. I usually use a cooking oil spray to coat the outer part of the fish with oil. This will prevent the fish from sticking to the grill. If there are still scales, coating the fish with oil is not necessary. It will also be handy if you have a grilling basket for fish because you can easily flip the fish when needed. It also holds the stuffing and prevents it from falling-off while you grill.

That’s about it. The next steps are all up to you. You might probably arrange this in a boodle fight manner with banana leaves, rice, and all the nitty gritty. You can also simply do this like I do — arrange in a large plate and serve in the middle of the dining table for the entire family to enjoy.


Grilled Tilapia with Stuffing

Try this Grilled Stuffed Tilapia Recipe. Let me know what you think.

Grilled Stuffed Tilapia Recipe
 
Prep time
Cook time
Total time
 
Author:
Serves: 3
Ingredients
  • 1 whole large tilapia, cleaned (scales and gut removed)
  • 1 large plum tomato, cubed
  • 1/4 cup chopped scallions
  • 1 small yellow onion, cubed
  • 1 teaspoon minced ginger
  • 1/2 teaspoon garlic powder
  • 1 tablespoon lemon juice
  • 1/4 teaspoon ground black pepper
  • 2 1/2 teaspoons course sea salt
  • Cooking oil spray
Instructions
  1. Rub 1 1/2 teaspoons salt all over the fish. Set aside.
  2. Combine the tomato, onion, scallions, garlic powder, ginger, lemon juice, pepper, and remaining salt in a bowl. Mix well.
  3. Stuff the mixture in the cavity of the tilapia.
  4. Heat-up the grill. Once the grill is ready, spray a little cooking oil on both sides of the tilapia. This will prevent the skin of the fish from sticking on the grill.
  5. Grill each side of the tilapia for 10 to 12 minutes.
  6. Remove from the grill and arrange in a serving plate. Serve with your favorite dipping sauce.
  7. Share and enjoy!
Nutrition Information
Serving size:  3
3.3.3077


Grilled Stuffed Tilapia
9
Shares
2
1
0
6
Share on Pinterest


Yum
post from sitemap
Read more ...

Saturday, May 23, 2015

Crispy Fried Jeprox

Crispy Fried Jeprox is a simple dried fish dish similar to daing.This is a very simple and straightforward recipe that will remind you on how to cook daing or salted dried fish (and we are using Jeprox for this recipe).

Jeprox recipe

What do you think about the name of this dried fish? If you will ask me, I think that naming a type of dried fish as “Jeprox” is funny sounding. An old Pinoy Rock song is the first thing that come into my mind when I see this fish. However (and although it sounds funny), the satisfaction that I get when eating crispy fried jeprox is no joke at all. I enjoy having this for breakfast with a bowl of super spicy vinegar and sinangag.

So what is the difference between Jeprox with Daing? You see, I had the same question too because they all look the same at first glance. Although you will notice that jeprox is lighter and thinner compared to regular salted dried fish. From what I gathered, Jeprox is made from a variety of fish called Smelt; it is a species of fish that can commonly be found in North America.

Having said that, I am now wondering if there is also Jeprox in the Philippines? Don’t get me wrong, I know that most of you will say that there are lots of Jeprox out there almost anywhere — but I’m asking about the fish though. I heard that there is a type of dried fish with the same name in Pangasinan, but I have not tried it yet. It may or may not be using the same kind of fish. since you know better than I do, a quick comment with your thoughts will help.

Try this Crispy Dried Jeproc Recipe. Enjoy!

Crispy Fried Jeprox
 
Author: 
  • Serves: 3
  • Serving size: 3
Prep time: 
Cook time: 
Total time: 
Ingredients
  • 3 ounces packaged dried jeprox
  • 4 tablespoons cooking oil
  • ½ cup spicy vinegar
Instructions
  1. Heat the oil in a frying pan
  2. Once the oil heats-up add around 3 pieces of dried jeprox and fry each side until the color turns golden brown and the fish starts to curl. Make sure that the oil is not too hot when you put the fish in. This will prevent it from getting burnt quickly and will avoid a bitter aftertaste. Perform this step until all the fish are consumed.
  3. Using a spoon, scoop some hot oil from the pan and pour-it over the fish so that the opposite side will get cooked and crispy. Turning the fish over will not cook the fish equally since it is already curly.
  4. Remove the fried jeprox from the hot pan. Place in a plate lined with paper towels.
  5. Transfer to a serving plate. Serve with rice and spicy vinegar.
  6. Share and enjoy!
3.3.3070


Jeprox

post from sitemap
Read more ...

Thursday, May 21, 2015

Crispy Tilapia Sticks Recipe

Crispy Tilapia Sticks is a delicious crispy flavorful tilapia fillet dish. The fish is seasoned and dredged in a beading of Panko breadcrumbs, then deep fried until crispy. Crispy Tilapia Sticks makes a delicious appetizer and I think that it goes well with fresh homemade ranch dressing.

Crisp Tilapia Sticks_

This Tilapia sticks recipe was from my mom. She made the entire thing while I salivate and wait for it to be done. I was whipping-up some fresh homemade ranch in anticipation of the dish that I will soon be devouring. I can say that even though this dish is really simple, it tasted good and the texture is just perfect.

I know that most of us will say and think that nothing beats our mom’s cooking. I still think the same up to now. She was the reason why I got interested in the kitchen and all things related to food and cooking, in the first place — and she still continues to perform her magical cooking tricks to this day. I am really glad that she came here in the US to visit us.

Crispy Tilapia Sticks also goes well as a main dish. If I will eat this with rice, my preference is to have a dip made-up of soy sauce and lemon or calamansi (or simply Toyomansi).

Try my mom’s Crispy Tilapia Sticks Recipe. Enjoy!

Crispy Tilapia Sticks Recipe
 
Author: 
  • Serves: 4
  • Serving size: 4
Prep time: 
Cook time: 
Total time: 
Ingredients
  • 1 lb. thick tilapia fillet. each piece sliced lengthwise into 3 to 4 pieces
  • ½ teaspoon garlic powder
  • ½ teaspoon onion powder
  • 1 teaspoon sea salt
  • ¼ teaspoon ground black pepper
  • 2 eggs, beaten
  • 1 cup Panko breadcrumbs
  • 2 cups cooking oil
Instructions
  1. Combine the salt, garlic powder, onion powder, and ground black pepper in a bowl mix well.
  2. Rub the mixture all over the sliced tilapia fillets.
  3. Meanwhile, pour the oil in a deep cooking pot. Turn-on the heat and start to heat-up the oil.
  4. Dip the tilapia fillet in the bowl with beaten egg then dredge the tilapia in Panko breadcrumbs. ake sure that the tilapia is well coated. To save more breadcrumbs and for better coating, you can place the breadcrumbs in a container with cover. Simply put 2 to 3 pieces if tilapia fillet in the container with breadcrumbs, cover it, and then shake the container back and forth. You will see that the tilapia will be coated properly.
  5. Put the breaded tilapia into the hot oil and start to deep fry the fish until the color turns golden brown. Use medium heat in this step
  6. Remove the deep fried crispy tilapia sticks from the cooking pot and place in a plate lined with paper towel.This will absorb the excess oil.
  7. Transfer the crispy tilapia sticks in a serving plate and serve with a bowl of fresh ranch dressing. You can also serve this with tartar sauce.
  8. Share and enjoy!
3.3.3070


Crisp Tilapia Sticks Recipe

post from sitemap
Read more ...

Wednesday, May 20, 2015

Sinigang na Bangus sa Bayabas

Sinigang na Bangus sa Bayabas is a version of sinigang that makes use of ripe guava as the souring agent. Sinigang is a Filipino sour soup dish that commonly uses unripe tamarind or bilimbi to make the sour sour. This singang na bangus sa bayabas is not as sour as the traditional singing dishes, but it has a nice mild flavor that I liked.

Sinigang na Bangus sa Bayabas

I was not able to enjoy this sinigang version as I was growing up. This is one of the reasons why I was skeptical about this dish. However, things changed when I had the courage to try it. I thought that it was not bad, and I even had more until finished the entire bowl.

I think that it takes a little getting used to, or what they call acquired taste in order for most of us to enjoy any sinigang sa bayabas version. I am not a fan of guava, but I like milkfish and fish sauce. The flavor of the milkfish blends well with the guava and the fish sauce making this dish successful. It will be better if you use the ripest guava that you can get for optimum flavor.

Sinigang na Bangus sa Bayabas Recipe

Try this Sinigang na Bangus sa Bayabas. Let me know what you think.

Sinigang na Bangus sa Bayabas
 
Author: 
  • Serves: 3
  • Serving size: 3
Prep time: 
Cook time: 
Total time: 
Ingredients
  • 1 medium milkfish (bangus), cleaned and scales removed and sliced into steaks
  • 2 cups baby spinach
  • 4 to 6 pieces guava (ripe)
  • 8 pieces okra
  • 1 small onion, wedged
  • 2 medium tomato, wedged
  • 2 pieces Jalapeno pepper
  • 2 tablespoons fish sauce
  • 1 teaspoon ground black pepper
  • 4 to 5 cups water
Instructions
  1. Pour the water in a cooking pot. Bring to a boil.
  2. Put-in the guava, tomato, onion, and whole peppercorn. Let it boil. Continue to boil (covered) for 15 minutes or until the guava and vegetables are soft. You may add more water if needed.
  3. Using a fork of potato masher, mash the guava and vegetables inside the cooking pot to extract the flavors. This is an optional step, be extra careful.
  4. Pour-in the fish sauce. Stir.
  5. Add the milk fish. Cook for 5 to 10 minutes in medium heat.
  6. Add the okra and Jalapeno. Continue to cook for 5 minutes.
  7. Put-in the spinach. Cover the cooking pot. Turn the heat off. Let the spinach stay in the pot for 5 minutes.
  8. Transfer to a serving bowl. Serve.
  9. Share and enjoy!
3.3.3070


Watch the cooking video:

post from sitemap
Read more ...

Friday, May 8, 2015

Mahi-Mahi Paksiw Recipe

Mahi-mahi paksiw is a dish wherein fish such as mahi-mahi (which is also known as dolphin fish – don’t worry, this is not our friendly dolphin flipper) is cooked in vinegar with some spices. This is a simple Filipino recipe and it is consumed best with warm rice. Other names of this dish are paksiw na isda or pinangat na isda (not to be confused with Bicol’s version of pinangat because the latter makes use of coconut milk).

Mahi-mahi Paksiw

This version of paksiw na isda is different from the traditional recipe because the fish was first grilled before cooked in vinegar. I like to do this sometimes because I thought that grilling makes the fish tastes better — there is a smoky component into this dish, which I really liked.

I made use of mahi-mahi fillets to cook this dish. You can do the same or you can also use other fish variety whether fillet or whole, just make sure to clean the fish well and remove the scales before cooking. I find coconut vinegar best for this recipe. However, you can also use whatever type of vinegar is available in your area. White vinegar and apple cider vinegar will work too.

Try this Mahi-mahi Paksiw Recipe. Let me know what you think.

Mahi-Mahi Paksiw Recipe
 
Author: 
  • Serves: 3
  • Serving size: 3
Prep time: 
Cook time: 
Total time: 
Ingredients
  • 1 lb. Mahi-mahi fillet
  • 1 teaspoons salt
  • 1 teaspoon whole peppercorn
  • 2 pieces long green chili
  • 4 cloves garlic, crushed
  • ½ to ¾ cup coconut vinegar
  • ¾ to 1 cup water
  • ½ teaspoon sugar
Instructions
  1. Rub salt all over the mahi-mahi fillet.
  2. Heat-up the grill then grill each side for 3 minutes.
  3. Meanwhile, combine water, vinegar, whole peppercorn, garlic, and sugar in a cooking pot. Let boil. Adjust the heat to low.
  4. Put-in the grilled mahi-mahi and long green chili then continue to cook (covered) for 12 to15 minutes. Add more water if needed.
  5. Transfer to a serving plate.
  6. Serve. Share and enjoy!
3.3.3070

Mahi-mahi Paksiw Recipe
post from sitemap
Read more ...

Tuesday, April 14, 2015

Tokwa and Tuna Recipe

Tokwa and Tuna is an appetizer dish composed of fried extra firm tofu and grilled ahi tuna. A Filipino dish called Tokwa’t Baboy, which is made up of tofu and pork, was the inspiration for this dish. I thought that using ahi tuna will compliment the fried tofu – and it did.

Tokwa and Tuna Recipe

I think that Tokwa and Tuna have some similarities with kinilaw or kilawin and sinuglaw; all these Filipino food favorites are all soaked in a vinegar mixture and all make a good appetizer or “pulutan”.

Tokwa and Tuna_

This dish is a good option for those of you who like the idea of a healthier and leaner tokwat baboy (without the pork though). You’ll get a good amount of the protein from the fish and tofu and you will worry less on having bad cholesterol or a possibility of getting high blood pressure after eating this dish.

Try this Tokwa and Tuna recipe. Let me know your what you think.


Tokwa and Tuna Recipe
 
Author: 
  • Serves: 4
  • Serving size: 4
    Prep time: 
    Cook time: 
    Total time: 
    Ingredients
    • 6 oz. ahi tuna
    • 14 oz. extra firm tofu
    • 1 medium red onion, sliced
    • 3 pieces long green chili, sliced
    • ¾ cup apple cider or cane vinegar
    • 2 tablespoons soy sauce
    • 2 tablespoons granulated white sugar
    • 1½ cups cooking oil
    • Salt and ground black pepper
    Instructions
    1. Combine the vinegar, soy sauce, and sugar in a bowl. Mix well. Microwave for 15 seconds. Set aside.
    2. Rub ¼ teaspoon salt and ⅛ teaspoon ground black pepper on the ahi tuna. Let it stay for 15 minutes.
    3. Heat-up the grill. Grill the tuna for 3 to 5 minutes per side.
    4. Remove the tuna from the grill. Slice into cubes. Set aside.
    5. Heat the oil in a deep cooking pot.
    6. Once the oil is hot, deep fry the tofu (two pieces at a time) until the color turns golden brown.
    7. Remove the tofu from the cooking pot. Let the excess oil drip. Slice the tofu into cubes. Set aside.
    8. Combine the tuna, tofu, onion, and green pepper in a mixing bowl. Toss.
    9. Pour-in the vinegar mixture. Gently toss until all the ingredients are well blended.
    10. Transfer to a serving plate or bowl.
    11. Serve. Share and enjoy!
    3.2.2925


    Want to start your own blog?

    We can help. Click this link to view the tutorial on How to Start a Blog . If you have questions, I am here to help. Send me a message using the contact page.


    Recommended for you


    post from sitemap
    Read more ...

    Tuesday, April 7, 2015

    Basic Cedar Plank Salmon Recipe

    Salmon is one of my favorite fish, whether raw or cooked. It is very flavorful and it can be prepared in many ways. I like salmon sashimi better than tuna (although tuna is better for ceviche or kinilaw, in my opinion), and I also enjoy having salmon in salads – just like baked salmon that topped over the salad. Click here to see our simple baked salmon salad recipe.

    Cedar Plank Salmon Recipe

    On another note, this Basic Cedar Plank Salmon Recipe is simple and very easy to prepare. I am using wild caught salmon for this since it has less mercury compared to farm raised salmon. Cedar plank is also needed for this recipe. The plank helps the salmon dish taste better and have a more appetizing aroma.

    Cedar Plank Salmon_

    I mix all the spices and seasoning (salt, pepper, garlic powder, onion powder) in olive oil, then rub the mixture all over the salmon fillet. You will need to wait for a few minutes until the fish absorbs the flavor before you start to grill the fish. The key is to cook the salmon just right so that the fish won’t get dry. You will know that the fish is ready if the consistency gets flaky.

    Cedar Plank Salmon Raw

    Basic Cedar Plank Salmon can be enjoyed in many ways. You can dip it in lemon butter sauce, or even in toyo mansi (mixture of soy sauce and calamansi) for a more Filipino experience.

    What are your favorite salmon dishes?

    Try this Recipe for Basic Cedar Plank Salmon. Please let me know your thoughts by commenting.

    Cedar Plank Salmon
     
    Author: 
    • Serves: 4
    • Serving size: 4
    Prep time: 
    Cook time: 
    Total time: 
    Ingredients
    • 1½ lbs. salmon fillet (wild caught)
    • ¾ teaspoon sea salt
    • ¼ teaspoon ground black pepper
    • ¼ teaspoon garlic powder
    • ⅛ teaspoon onion powder
    • 1 tablespoon extra virgin olive oil
    • 1 piece cedar plank (soaked in water for at least 1 hour)
    Instructions
    1. Combine salt, pepper, garlic and onion powder in a bowl. Mix well.
    2. Pour the oil in the bowl and mix with the spices.
    3. Rub the oil mixture all over the salmon fillet. Let it stay for 15 minutes.
    4. Heat-up the grill.
    5. Meanwhile, place the salmon on the cedar plank.
    6. Arrange the cedar plank with salmon on top of the grill. Cover the grill and continue to grill the salmon for 15 to 20 minutes, or until the salmon gets flaky.
    7. Remove the salmon from the grill. Arrange in a serving plate.
    8. Serve with lemon or calamansi.
    9. Share and enjoy!
    3.2.2925


    Want to start your own blog?

    We can help. Click this link to view the tutorial on How to Start a Blog . If you have questions, I am here to help. Send me a message using the contact page.


    Recommended for you

    post from sitemap
    Read more ...

    Wednesday, March 4, 2015

    Easy Fish with Tausi Recipe (Fish with Salted Black Beans)

    Fish with salted black beans is one of the Asian fish recipes that I enjoy for a couple of reasons: it is quick and easy to prepare; and it really tastes awesome – even when eaten with plain white rice. This fish recipe is perfect for lent and for people who love to eat fish most of the time.

    fish with tausi recipe

    You can use any type of fish fillet with white meat for this recipe. I usually get whatever frozen fish fillet that is on sale from my local grocer. I do not recommend salmon or tuna for this recipe as both have empowering taste that can affect the overall flavor of the dish. Try mahi-mahi, cod, tilapia, or even cream dory.

    In order to balance the taste of the black beans (since it is very salty), I soak it in warm water before cooking. It will really be nice if you have all the ingredients ready because each has its own contribution that makes this dish perfect.

    fish with tausi_

    Try this Easy Fish with Tausi Recipe (Fish with Salted Black Beans). Enjoy!

    Easy Fish with Tausi Recipe
     
    Author: 
    • Serves: 3
    • Serving size: 3
    Prep time: 
    Cook time: 
    Total time: 
    Ingredients
    • 1 lb. fish fillet (mahi-mahi, cod, or cream dory), cut into cubes
    • 3 tablespoons salted black beans (tausi)
    • ½ teaspoon minced ginger
    • ½ teaspoon minced garlic
    • 4 stalks green onion, chopped
    • 1½ teaspoon sesame oil
    • 5 tablespoons sherry cooking wine
    • ½ teaspoon salt
    • 3 ½ tablespoons cornstarch
    • ¾ cups chicken stock
    • ¼ teaspoon ground black pepper
    • ½ teaspoon sugar
    • 1 cup cooking oil
    Instructions
    1. Marinate the fish by combining 3 tbsp. sherry cooking wine, salt, and 1 tsp. sesame oil in a bowl. Mix well. Add the fish cubes and marinate for 30 minutes.
    2. Soak the salted black beans in warm water for 15 minutes. Drain and set aside. We will use this later.
    3. Start to fry the fish by heating the oil in a cooking pot. Remove the fish from the marinade. Roll the fish cubes on a bowl with 3 tablespoons cornstarch. Make sure that the fish is fully coated. Fry the coated fish until the color turns light brown. Remove from the cooking pot and place in a plate. Set aside.
    4. Make the sauce by combining the chicken broth, ½ tsp sesame oil, 2 tbsp. sherry cooking wine, ground black pepper, ½ tbsp. cornstarch, and sugar. Mix well.
    5. On a separate frying pan, heat 3 tablespoons of cooking oil (re-use the oil that fried the fish). Saute garlic, ginger, and salted black beans for 30 to 60 seconds.
    6. Put-in the fried fish cubes. Stir.
    7. Pour-in the sauce mixture. Stir and continue to cook until the sauce starts to thicken.
    8. Sprinkle some green onions.
    9. Transfer to a serving plate. Serve.
    10. Share and enjoy!
    3.2.2925

    Aside from this recipe, there are other dishes that you can make using salted black beans. Here are my suggestions:
    • Pork with Salted Black Beans
    • Tofu in Black Bean Sauce
    • Tilapia with Salted Black Beans
    • Tofu with Tausi and Straw Mushrooms
    • Pork and Tofu in Oyster Sauce
      

    SHARE

    facebooktwittergoogle_plusredditpinterestmail

    Recommended for you

    post from sitemap
    Read more ...